It's a few weeks ago now that we went to the Country Living Fair in Rhinebeck, NY. And I know it might be strange to blog about it this far after the fact, but I have to be honest...we've been so busy and I just haven't been able to find the time to get the photos downloaded and all the rest. So I vowed that I'd at least blog about our adventure before the month of June came to an end!
We drove up with our friend Marlene, who is always a ton of fun. We hit a couple traffic snares but the three of us talk a lot and have a ton of fun stories to tell, so the ride flew by. It's the best when Marlene gets on one of her unstoppable laughing jags! She really cannot stop herself from laughing! a whole lot of shoulder shaking going on.
It's a weekend long event, but we only did Friday...which was the best weather day all weekend. But one day is barely enough time to really experience the whole fair.
As you walk through the entrance into the fair you're greeted with the most adorable festive oil cloth bunting, criss crossing above all the pathways. The buntings were made by
Modern June, who also had her own booth full of all sorts of oil cloth goodies. I know Marlene grabbed at least a couple yards of oil cloth for some home projects.
Also, you can see some adorable trailers real tiny in the background in the pic above, and one behind Aaron in the below pic. They place the trailers mostly up front at the show, which is such a great mood setter. The
CL Fair in Atlanta was also full of cute old trailers.
The very first thing we came upon was the cutest minty green vintage tin toy oven. As you can see in the pic, it matched the neighboring trailer perfectly. The price for the oven was a little high for us, but maybe the neighbor gal who owned that trailer ended up taking it home.
I wish I could convey just how HUGE this show was! We were there all day and there is no way we saw everything. I feel like there was a dozen or more of these buildings lined up one after another. Each was packed with stalls filled with art, antiques, vintage, fabrics, paintings, dolls, jewelry, you name it! The floors were covered in wood chips. And due to the super warm weather a whole lot of us gals were in flip flips or sandals of some sort. And since the wood chips are really just oversized sawdust, your feet get very dusty. But it's "Country" Living right? Dust is required.
Earth Angels is always one of our very first stops. They've always got the best looking set up, a prime location, and SO MUCH good stuff. The following group of artists are all part of the Earth Angels collective, which is headed up by the awesome Jen O'Connor.
I adore the work of
Caramia Visick. This is some of her Hot Cakes jewelry!
And then we have our talented friend
Laurie Meseroll's mudcakes pieces! She paints so so much, and every piece is amazing. We love her art so much.
It was so good to see and talk to our friend
Letty Worley. She is so incredibly talented. Her soft sculptures and purses are all so magical. Bears and porcelain doll heads, glittery party hats...all in the best vintage color palette.
Oh hey! Derp!
Jennifer Lanne is another of our fave Earth Angels artists. I showed some of her paintings in our
Atlanta CL Fair post. Her paintings make such a bold statement, and the colors are gorgeous.
I cannot handle the cuteness of these
Nicole Bowen plush pieces! They're almost pastel...but then they're given a time worn feel. The soft glow of color that she gives to the cheeks is perfect.
Seriously, can you even handle this little cutie?!
Humpty up above, and the two pics below show the work of
Nancy Wiley. It was our first time meeting her and we were blown away by the intricacy of her dolls.
Here she is holding one of her story books. It's an Alice in Wonderland picture book, but instead of illustrations, every image throughout the book is a photograph of her handmade dolls posed in elaborate set pieces.
Here are some more of her pieces.
Right after Earth Angels we hit some other nearby vintage booths.
There is such an amazing selection of vendors at the show. Besides being able to shop for art and decor, there is just lots of great old stuff that you can use for your own creative projects.
We loved this booth called
Outdated. They have a brick & mortar shop as well, located in Kingston NY, that has antiques, coffee, and food.
Like I said, they do antiques and food. Aaron had to grab one of their vanilla fig scones. Deeelish.
So great seeing
Cari Cucksey, who we met for the first time at the Atlanta show and have been Instagram friends since. Her booth was fantastic and huge. She was debuting her brand new paint collection.
It all looked so so good! Marlene actually took home a quart.
Also so so great to finally meet our long time online friend Crystal of
Vintage by Crystal, and her sweet husband, and baby Olive. We have been collecting Crystal's pieces for years.
Her offerings were amazing! Sooo many! Hundreds of unique one of a kind pieces for every holiday and occasion. When I look at her pieces I can imagine the tiny world they inhabit.
The goods also spill to the spaces outside of the buildings. There are stacks and piles of overflow pieces right outside each big pavilion...great old tables, benches, stools, garden decor....
And there are full outdoor set ups like this one above. We loved this giant painted photographer chap.
This booth really spoke to me...lots of of my type of collections...namely, vintage wrapping paper.
I loved this vignette...all creams, greys, pale pinks, and bits of black. I love the little black lamb, and the vintage crepe paper nut cup.
Here's a pulled back shot in that same booth. Check out the jewelry sign and those grey drawers!! swoon!
All of the vignettes followed color themes.
One thing you saw lots and lots of throughout the show were vintage flashcards. We flipped through hundreds. It can get overwhelming. Which is a reason why getting a weekend pass and a hotel room would definitely be worth it next time around. Then we could take our time.
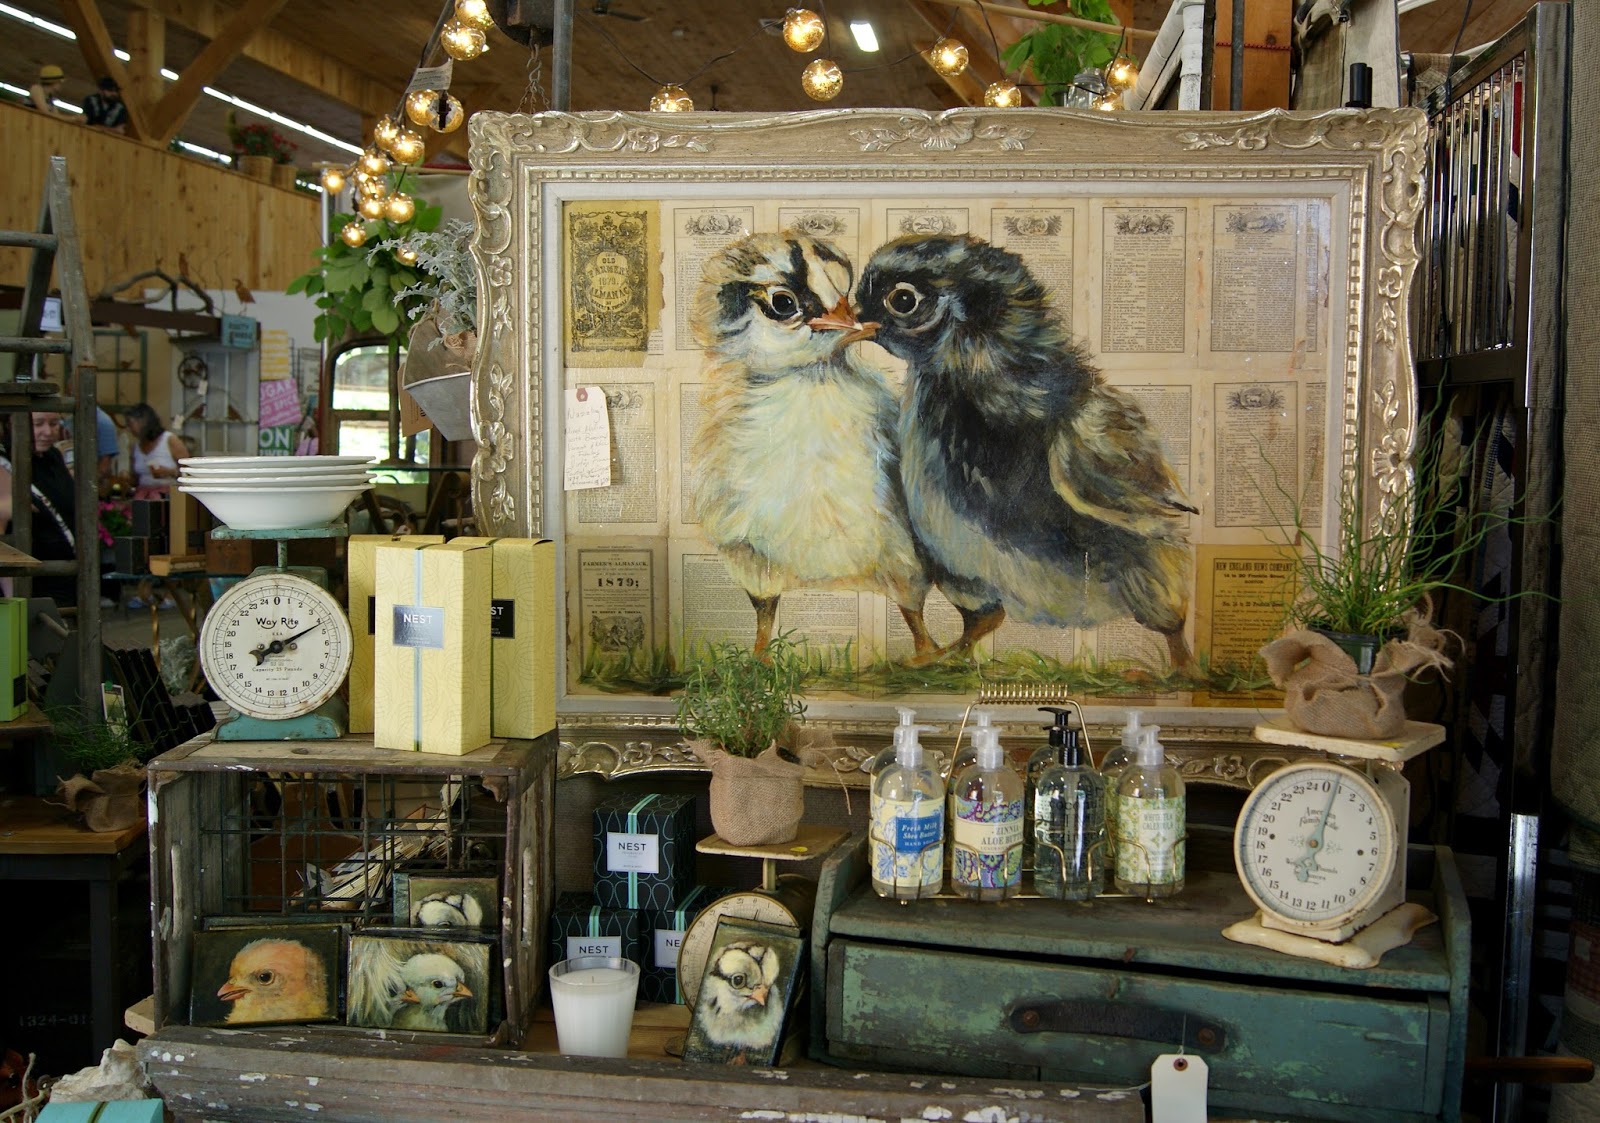
This booth was really great. Besides so many fab vintage goodies, they had their own paintings and prints on canvases. Look at those chicks on the old farmers almanac pages!
There were sooo many options for food! Even for us health concious folks. Aaron got a great hummus wrap at the Juice Caboose...super tasty, I tried a bite. They had all of these massive bags of carrots for their smoothies. Marlene and I got really delicious falafels. So fresh and with delicious toppings.
After lunch Marlene grabbed a healthy smoothie while Aaron walked on the wild side at the Leslie's Hot Cakes airstream. He saw "Home of the Maple Milk Shake" and couldn't resist. I had a sip. It was amazing!! so buttery!
It was great seeing the girls at
Findings, who are from here in Jersey. They once had a shop down the shore in Pt. Pleasant that we blogged about a few years ago. And we also saw them at the
CL Christmas Bazaar in Tarrytown this past winter. They always have great stuff.
These old military letters...tied up with pink ribbon in bundles.
They've got beautiful jewelry, tons of old photos and vintage findings galore.
So we met this really sweet couple, and their booth was called
La Bonne Vie . As we walked into the space we were taken aback by this piece. It was playing a Dean Martin record...it's a combination record player, bar, and faux fireplace. It is so Graceland! So Hugh Hefner! It was amazing. It was in great condition, and I never saw anything like it. The label inside said 'made in West Germany'...where I suppose they know how to party in style.
La Bonne Vie also had fab necklaces for wedding day or wedding party gifts. They were packaged adorably.
Not my colors, but this sunny happy piece was so inviting.
I am a lover of pink tin kitchen sets. I have a few pieces here at home.
Loved this booth! They go by Tin Hearts, by Carol Mataruso. We spent quite a while smiling at each piece and trying to decide which one to take home.
This girl stole my heart! Her face is perfect! She happened to be quite large, and everything we own is on the smaller scale. If the entire assemblage was the size seen here, from the coffee pot up, she could have worked for us.
But she was quite tall as you can see in this pic, and she has the big red sugar tin...which don't get me wrong...looked amazing!! But we just don't have red in our kitchen. We are all neutral tones with bits of pink and aqua and black. But we spoke to Carol about a future custom piece or two.
The lamps were incredible. So BIG! And almost all had sold signs on them.
This sign is so good. It was hanging in one of our fave booths,
South Porch Antiques. We met them in Tarrytown as well, and purchased a few things from them including our favorite shredded vintage book page wreath.
The thing we fell in love with this time was their handmade niches. Made from wire, wood, and old book pages. It was so hard to decide on the perfect one for us. If there was only one we would have grabbed it. But given the choice of a dozen and it is impossible. I am the worst when it comes to choosing the one fave out of a dozen similar objects.
I loved this old floral painting. And you can see some tiny niches in the cubbies. They were super cute too!
These were fantastastic and so clever! Vintage honey boxes, with vintage photos slipped inside, so they can be used as a picture frame. They'd be so adorable in a vignette on a shelf. Marlene aka Mizz Bee, was thrilled and bought a few.
Everything about their space was perfectly curated. Great mixes of textures and elements.
Our friends Shannon and Elton at
Stash Style were killing it as always with a fantastic set up.
We love these guys. So much style under one roof...or tent.
They really really know how to set the mood with their displays. They now carry one of Aaron's fave brands of boots and shoes.
Loved this sweatshirt...the back had a panel of vintage lace on it. I should have bought it! They've got so much great vintage clothing that they adorn and dye...and then there are t-shirts, art pieces, and decor.
And this was maybe my favorite booth of the day as far as new-to-me vendors go. Curated by Peg & Jon Van Dyne of French Vanilla. There was SO MUCH I would have taken home if I had money to throw around. Such a great eye! This dresser was incredible! It had an old marble top...so so up my alley. And the little cabinet on top...ahhh!!
This chair killed me...I LOVED it! Cream and black is mostly what we live with at home.
We got a big kick out of this bottle. Yes, that says Pre Digested Beef. What in the world?! We showed it to Peg & Jon and they had no idea that they owned a Pre Digested Beef bottle. It was in a bin with many others types of old bottles...they never thought to read each one. Jon googled it on his phone...way back when they used it as a dietary supplement for underweight babies and ill malnourished people. Beef in a bottle???! I'll stop talking about this topic RIGHT NOW.
This is the piece I wanted most from the fair. But I had already nearly hit my budget for the day and it was $90.00. If it was $45 it would have been mine. I just couldn't spend double. But man I loved it a LOT! One of my all time fave fave things to collect are vintage medicine cabinets and other odd shaped cabinets. This was a perfect little cube with glass shelves.
Such a fabulous mix...wood, zinc, canvas, porcelain...all in the most gorgeous aged tones.
I walked by this booth had to stop. This metal awning is so Jersey shore. Lots of houses here on shore had them. Wouldn't it be fab over a bed?
Jenny Bowlin's booth is always fab! Lots of great displays. We loved the juxtaposition of elements...those books, the alligator head, the military photo, glass, and crystal clusters.
This booth, though not our color scheme at home, was so fun and kitchsy. Another little tin toy stove. Those are a big fave of mine.
It was so hard to get a pic without glare. These framed photos are all from the same family...maybe from the 30's or early 40's. The same kid is in a lot of the pics, and you can see him grow up.
Loved these little Marquee letters and numbers in the
Jillibean Soup booth. We came home with our fave number...9
The drive home was traffic free and the views were great...such a gorgeous sky. A very nice area of NY state to drive through.
So here is part of our haul from the day. The pink topped rusty stool was only $22.00. Also pictured is our niche from South Porch Antiques, a crystal cluster from Jenny Bowlin, and a bunny from Vintage by Crystal.
We had such a great time! We're so glad we went, and we're lucky to have a friend like Marlene who is into the same things we are. Shopping together was awesome, and we had great conversations on the ride to and from.
If you have the chance to go to this or any other Country Living Fair...GO! Make a weekend of it! Early June in Rhinebeck, NY is a pretty time of year. And you will be blown away by how much good stuff you can come home with for great prices.
Ok, success...I blogged it before June ended. Hope you enjoyed!
Back soon,
xoxo, Jenny...and Aaron