Thursday, 10 April 2014

"The Sweet Life" collection ...out in the world


Me and Aaron are artists who like to share. We know how much happiness the creative process brings us personally and through teaching we see how easily this happiness can be spread around. But teaching is just a drop in the bucket...you can only reach so many people. So when the opportunity to design a scrapbooking collection came our way we jumped at the chance. A scrapbooking collection is a very useful cog in the wheel of spreading creativity around. It's so cool to see our designs going to good use. And it's an honor. Seriously, It's an absolute honor when we see something that we painted here in our humble home being used as the focal point of someone's very personal creative project. So...now that "The Sweet Life" collection is out there in the world, we wanted to show some fab examples of how it's being put to use, and also tell you about some places where you might find it for yourself! 
We're totally loving these adorable mini albums by Melissa Phillips, using papers and journaling cards from the collection. The diagonal pink striped paper on the ice cream album is the flip side of our "Ballerina Cupcakes" paper. And the cakes you see on the ballerina themed album are from our paper titled "Hooray For Cake".


Again, this is one of our journaling cards being fabulously incorporated into a project. And those are a couple of our Washi Banner stickers affixed beneath the button.


Both of these adorable cards also by Melissa Phillips. This one has some of our "Bits & Pieces" paper in the background. I love the aqua vellum envelope, which is also from Melissa Frances, and the trim, ribbon, and tiny flower finish it off perfectly. 


If you checked out the pics or were lucky enough to be in Anaheim that weekend, you may have seen this adorable little treat container in our booth at CHA. It's made using our papers ("Sprinkle Everyday" and "Mixed Media Doodles"), a journal card, and our Sweet Life Words stickers. It was made by Rachel McAffee.


And she also made these adorable party hats! Seen here: a Journaling Card, and the pink stripe paper is from our "Ballerina Cupcakes" paper. 


The bunting banner on this hat is from our "Mixed Media Doodles" paper. The blue stripes are the flipside of our "Bits & Pieces" paper. And the "what a perfect day" banner is one of our Chipboard Accents. 


Another Chipboard Accent, and our pink stripe paper again. Of all our papers I believe we'll personally use the pink stripes the most. I love the sequins on this one!


And yes...we have Treat Bags! Though Rachel took them to another level with the fab embellishments. 


Here's another Treat Bag, and Rachel adorned it with one of my favorite journaling cards in our collection. It's our mascot bunny but rendered in basic black and white chalkboard style. I love the simplicity of the design. 

We have been receiving lots of emails from you guys asking when we will have our collection in stock in our online shop. The answer is: Any day now! Our order is in, and we are awaiting it's arrival on our doorstep. So as soon as it is in we promise to let you know! We love that you guys are so excited! We will be shipping worldwide!

But...If you truly just can't wait another second...


The awesome Blue Moon Scrapbooking carries most of the collection! And they've got a great little video featuring the items they've got in-stock. What a great source for tons of amazing scrapbooking supplies! We loved meeting Scott from Blue Moon at CHA. 


And for you paper loves in the San Diego, CA area...You can find "The Sweet Life" at the fabulous Paper Tales. Dining with all the Paper Tales gals was the highlight of our time at CHA. The realest, funniest, coolest, gang of gals you'll meet in the world of paper.


One of the funniest of the Paper Tales gals is our sweet and talented friend Karin. She will be teaching this adorable mini book using the collection at Paper Tales soon! 


And we are loving seeing peeks of projects using The Sweet Life over on Instagram. Loving these pics of this mini album that @maidmarianmade is working on! We love how she colored her Allie & Amy and cake! 

We are just so thrilled to see our designs in the hands of so many talented, creative, FUN people! We'd love to see pics of anything you've created using the collection! And we may share them here on the blog! So please feel free to send them to us or comment with a link to your blog post, or tag us on Instagram! @jennyeveryday

Thanks so much for popping in today! We hope that you are inspired by these projects! And we hope that you love "The Sweet Life". Have a great day friends!

Love from the NJ Shore, 
xo Jenny and Aaron

Tuesday, 8 April 2014

Paper Mache Confetti Keepsake bowls


We are definitely paper lovers and we know we're not alone. We talk about it in our book, how us crafters each have our own stories about hoarding pretty papers. When we were at CHA and went out to dinner with the Paper Tales girls, every single one of us admitted to holding onto our favorite sheets of paper from companies that are now long gone...our "stash" of untainted sheets that we'll probably never ever cut up. And why not? Some papers are a work of art and should be collected. We know first hand what goes into designing a paper collection. 

But alas, paper is meant for cutting, crafting, and making cool and pretty things. It's not just for scrapbooking. And we think that this project is great for those of you who are "paper curious". Those of you who visit the paper aisle in Michaels just to look at the patterns. Maybe you never buy any, simply because you don't know what you'd use it for. Well these bowls are a fairly simple way to get your feet wet with paper.  

 We came across this tutorial on pinterest and thought it would make a fun springtime weekend project. Making the paper mache paste for this project brought back so many childhood crafting memories. I remember making pinatas, bowls, and masks in school. It was so much fun! And so simple! I remember being amazed that those strips of newspaper dipped in homemade glue soon turned into a hard sculpture with a shiny finish. Anyone who uses mod podge in paper crafting is only a smidge away from doing paper mache art.

And this one is definitely kid friendly. Perfect for Spring (imagine filling the bowls with Easter eggs!), or for Birthdays, Christmas...We will be making Christmas bowls for sure...using a mix of patterned paper and vintage cards. You can do the same with Valentine cards, or maybe even a vintage baby shower bowl. For our bowl we wanted to use papers that worked well with our color palette, and we made it a keepsake by incorporating copies of vintage family photos.


Here is what you will need:

bowls (clear makes it very easy to plan your design)
whisk 
1/2 cup flour
3 tablespoons sugar
4 cups water total
patterned papers 
paper punch 
plastic wrap
gloss mod podge or varnish
paint brush


First mix a half cup of flour into 2 cups of cold water. While you do this bring two cups of water to a boil.


Once your water is boiling add your flour mixture to it and bring the pot to a boil again.


Remove it from the heat and then whisk in 3 tablespoons of sugar. The paste will thicken as it cools.


Now for your bowls. Again, you can use any bowl, but we used glass so that we could flip it over periodically to see how our design looked from the inside. Just cover your bowls with plastic wrap to keep your paper and paste from sticking to the bowls. Wrap the plastic at least an inch around the inside rim. Having this extra slack will make it easier for removal.


Next, just punch your papers. You can plan your bowls or you can let them happen naturally, like tossing confetti. We liked the idea of going mostly random but with some vintage photos placed throughout the bowl. 


The inside bottom of the bowl will be your focal point, so if you have any special images or photos place them here. We used our fingers mostly, just smeared the paste onto the paper, pressed it to the bowl, and then smeared more paste onto the back of the paper. Using two sided papers makes it easier of course. But they don't have to be two sided. You can just paste the exact same paper to the blank side of the paper that you just glued down.


Once the entire bowl is covered just give it a once over to see how you like it. Since there aren't any rules, if you see a spot that needs more of a certain color, just glue down another circle. 


This is the advantage of using a clear bowl. You can peek inside to make sure your positioning things exactly where you want them.


Be patient and let your bowl dry overnight. The next day, pop your new paper bowl off of the real bowl. It should pop off easily, but if it doesn't you can carefully slide a toothpick between the the paper bowl and the real bowl and gently pry it all the way around. That should do the trick. 
Then brush on a coat of gloss mod podge or varnish. We did two coats, making sure to let dry between coats.


Once they're fully dry they're ready for display. We love how these came out. The larger one has the vintage family photos inside and the smaller is just pretty patterned papers. 


We made our's fairly small, but if you're more ambitious you can make them really big...whatever you want. These are really just a tribute to true confetti bowls. You can also make a bowls from actual confetti and the process isn't much different. Check out a tutorial for that here.

Again, these were easy and fun. Kinda a carefree creative project for any skill level whatsoever. Definitely worth a try with the kiddos.

Ok, hope you have fun with paper mache!
xo, Jenny...and Aaron

Sunday, 6 April 2014

Around here...


For us weekends are still workdays, but we try to at least work on some other projects in tandem with whatever work we've got going on. The side projects act as pseudo-breaks in our day...but our real deal break time is when we stop to prepare and eat an awesome meal. I posted pics of today's dinner on Instagram earlier today and on another occasion when we made this same exact meal. A lot of people have been asking for the recipe so I figured I would share it here...well, I'm sharing a link to where we got the recipe from. We gave the dish a little bit of our own personal touches, but it's pretty faithful to the site where we got it from. So if you're interested in a delicious and healthy recipe then check down at the bottom of this post and be sure to follow the link. 
Everything else you'll see in this post is pretty much a glimpse of our weekend projects and recent bits of interest from around our home.
I'd love to tell you that one of this weekend's projects had to do with baking a cherry pie...but alas, the pic above of that perfect looking pie is sheer illusion. It happens to be made of paper mache! And old paper mache. It's one of my favorite vintage finds in a long time. I found it on ebay! And for $5.00! I have no idea how old it is...not that it really matters...I just love the idea of it. I'm normally a cake girl, but nothing says home sweet home like a classic cherry pie. And this one lasts forever. 


Oh, and while we are still in the kitchen, I wanted show you this update I gave to a little home project. Recently I shared a tutorial for these vintage inspired crates, and just the other day I ended up adding some vintage wallpaper to them. I really like the way the wallpaper softens their appearance. And I love little vintage vignettes like this. Vignettes put together with a variety of vintage, new, decorative, and practical items remind me of the good ol days of Anthropologie. I'm referring to the big location on West Broadway in NYC. Way back when Soho still had a bunch of vintage shops and cool independent decor stores. Anthropologie used to go all out with their in store displays. I still love shopping Anthro today, but it's much more streamlined. I loved how many vintage one-of-a-kinds you could find...and the displays were so darn artful and unique. But I can understand them doing away with those displays...I think I did way more gawking back then, and way less shopping.


As I said, this weekend was a typical Jenny & Aaron weekend. All sorts of projects happening at once. Lot's of paper, paint, glue...and yes...wood. You know what they say: "the couple that sands together..."
ha! but seriously, we are so thankful for all of our collectors/customers who make all of this work possible. We get so many return customers adding to their collections and that feels great. Presently, the wooden plaques are a hit. We've got lots going out in the mail this coming week. 


And it seems our Instagram inspired pieces must have been on a few wish lists lately. Lots of those are going out this week too!


This is a glimpse of one of the aforementioned side projects which will be part of a super cute blog tutorial. We have a few tutorials lined up and we cannot wait to share them with you! 


This was a little scene from this afternoon. Lots of circle punching going on. A fun project that we wanted to play around with...also for one of those future tutorials.


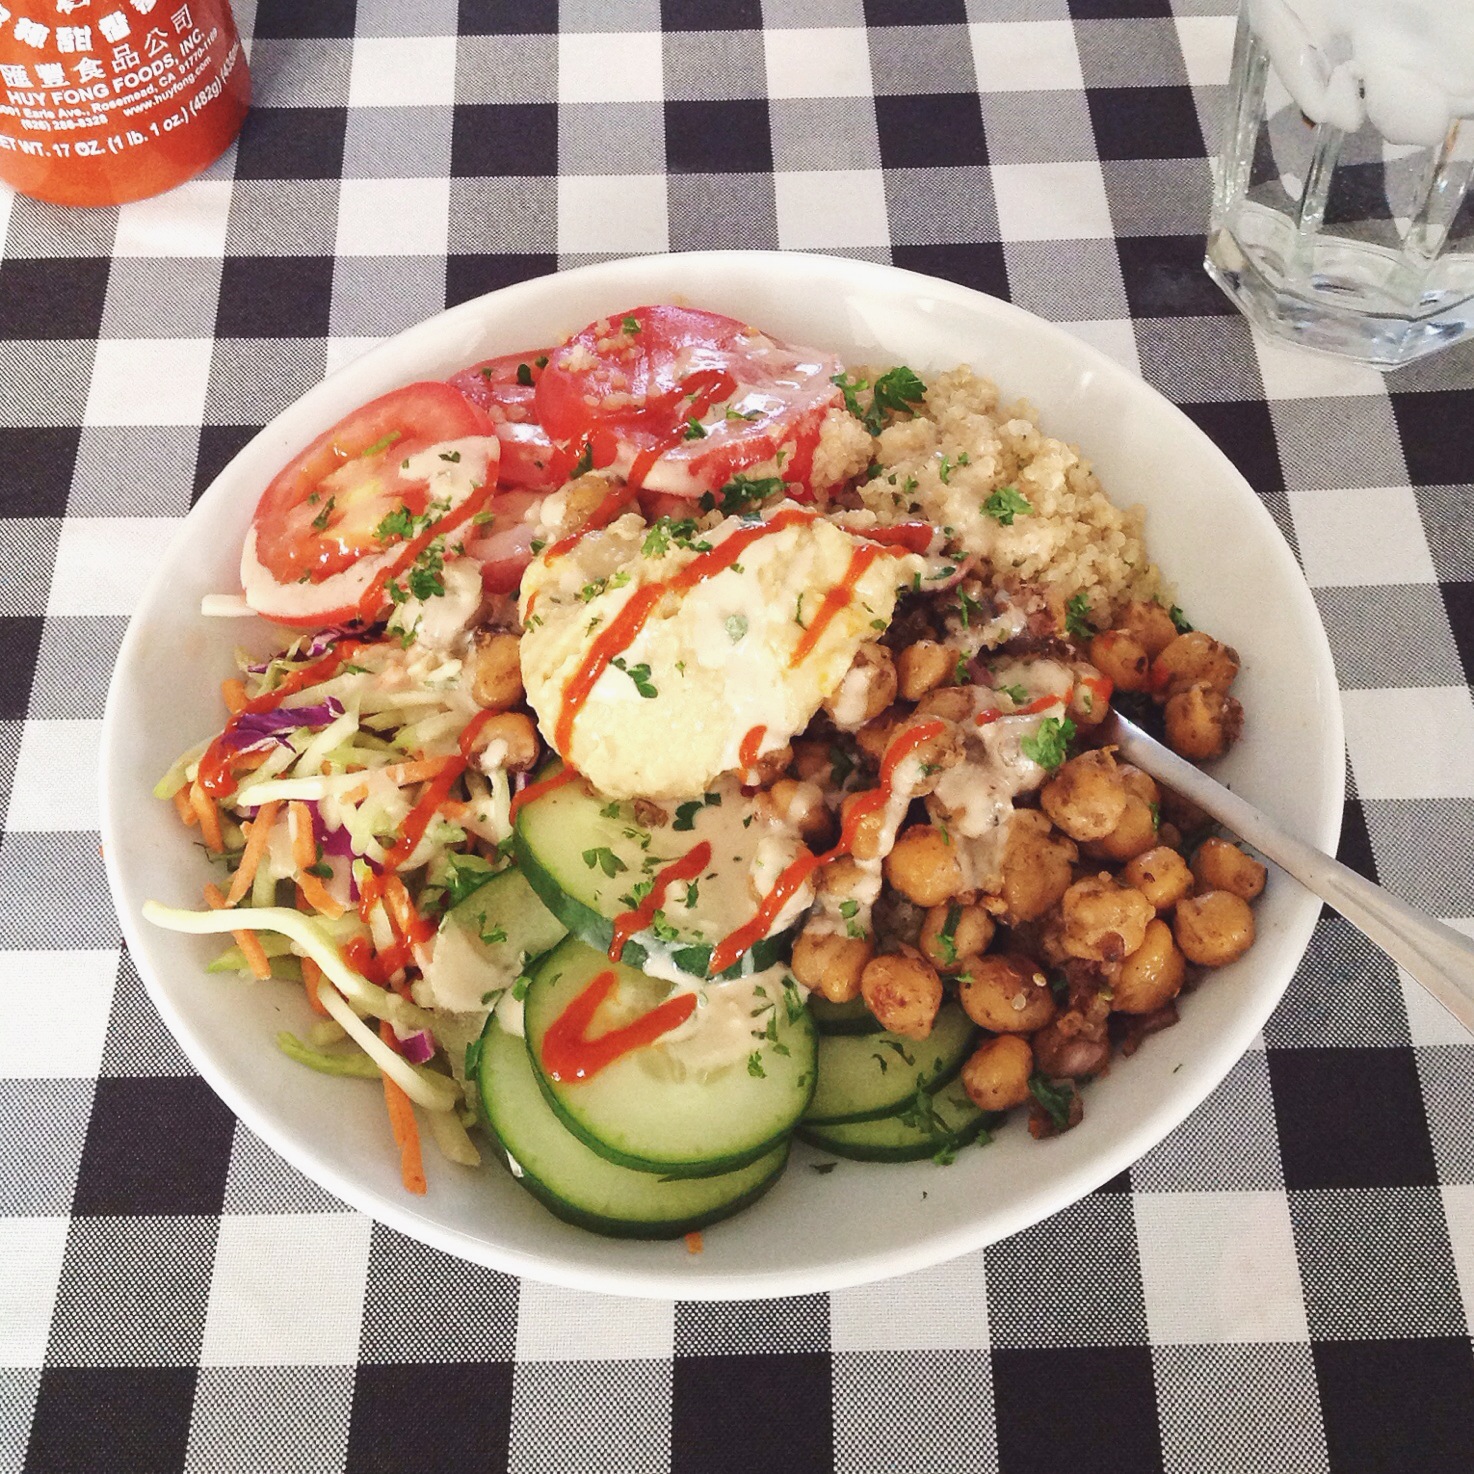
And here its the fab meal I mentioned earlier. Seriously delicious...light, and yet super satisfying and filling. So fresh and flavorful. They're called Deconstructed Falafel bowls and the name sums them up perfectly...but me and Aaron refer to it as "A party in a bowl"!


No pita bread here. In place of the pita bread just insert the grain of your choice. Tonight we used quinoa, which we love. It's protein packed and really pairs well with the tahini dressing. Also in this bowl: spiced roasted chick peas, hummus, tahini, fresh veggies, cucumbers, tomatoes, fresh parsley...and tonight we included a broccoli slaw mix. And for an extra kick we topped it with a little sriracha. 

If you are into these flavors and are looking for a great lunch or lighter yet filling dinner then look no further.

You can find the original recipe over at Vegan Yack Attack. And like I said, we really haven't changed much at all. In place of the pickled turnips we went with the broccoli slaw mix, and though we have made this using tabbouleh, tonight we went with quinoa being that we were out of tabbouleh. 

So...dinner was YUM, and now we are counting down the minutes till the season premier of Game of Thrones! Ahhh! Cannot wait! Anyone else psyched?

Happy Sunday friends! Thanks for popping in! Don't be shy, say hi in the comments!
xo Jenny...and Aaron 

Friday, 4 April 2014

Friday Favorites


Now more than ever I'm trying to conjure up Springtime. Like, maybe the ultimate Spring day will show up if I look at enough pics of adorable baby chicks, and Easter bunnies, and paintings of pretty girls rendered in pastel perfection. I feel like Spring is the least controversial, the least debatable of all the seasons. You never hear someone say "Yeah, well, I'm just not into Spring...it's not my thing."  Ha! I seriously just laughed to myself, imagining someone saying something as ludicrous as that. Everyone loves Spring. Even those nuts who love cold winters and endless snowfall...they too have their breaking point. By the time April rolls around they're dying for mild sunny days just like the rest of us. 

Right outside the studio window is this scraggly dead looking viney bush that climbs the neighbor's fence. I peek out the window at it every day to look for the tiny blooms of green that indicate the arrival of Spring. None yet. It's still scraggly and dead looking. But by mid-May it's a wild billowing mass of bright green. I love that. It gives me hope. And I think most artists feel like this. The Winter is hard on us, and the longer it lingers, the more our creativity seems to fade. But seeing that dead vine turn into a mass of vivid green year after year, without fail, let's me know that I too will come to life all over again...bloom bright in warm afternoon sunshine. We all will.

So c'mon Spring...get here already! I feel like each of these Friday faves is trying to summon Spring in one way or another. I adore the above image! I love that it welcomes Spring on multiple levels. I love that the letters themselves could not exist without the arrival of Spring. No Spring-no blossoms. No Spring-no green leaves, no bright green blades of grass. It's such a magical image...and I'm trying to say that in the least corny way. I love it!   


And your first thought might be "what does chocolate cake have to do with Spring?"
Well, I'll tell ya...this isn't just a chocolate cake...this is a Campfire Delight! It's a 6 Layer Rich Malted-Chocolate Toasted Marshmallow Cake, and it's from the always amazing Sweetapolita! A recipe like this says "bring on the warmer weather...nights spent out on the deck or in the yard, around the fire, toasting marshmallows, making s'mores". Oh jeeeeez, I need this.


I love the way that Spring is captured in these incredible paintings by Darcy Allan. Her use of color is so enchanting. All of her paintings are so fresh. She keeps her lines simple and loose. There is an airy feel to her work, a lightness that shouldn't be taken for granted, perfectly imperfect. 


A little while back I fell in love with this pair of videos...and now seems like the perfect time to share them. Nothing says Springtime more loud and clear than a little yellow duckling.
Caution: Your heart is about to melt.


And last but certainly not least are these incredibly cute cookies! I just adore the style and color palette of Micarina. I've seen my share of decorative cookies, but I've never come across such unique designs before! I love how whimsical, how cute...and especially how much personality these cookies have. They are so dreamy. It's impossible for me to pick a favorite...but those Budgies are amazing!

Ok, I hope we inspired Mother Nature to get a move on! Thanks so much again for reading. I'll be back soon with some crafty fun!
xo, Jenny...and Aaron says hi!


Wednesday, 2 April 2014

Recipe Review: Naughty & Nice (almost) Vegan Enchilada Casserole


This is our second time reviewing a recipe from Oh She Glows, and once again, we were truly impressed on multiple levels. The first recipe we had tried from Oh She Glows was her Green Powerhouse Pesto Plate. We were bowled over by that one. It was so tasty, and it was one of those healthy meals that makes you feel like you can conquer the world after you stand up from the dinner table. 
Well this recipe, the Naughty & Nice Vegan Enchilada Casserole, might not make you feel like you can conquer the world after you stand up from the dinner table...but it'll probably make you stand up and march into the kitchen for seconds. It definitely lives up to the 'Naughty & Nice' in it's name. It's loaded with veggies and is very low in fat, but the pasta and the delicious enchilada sauce are 100% comfort food. It's not hot & spicy...it's just very flavorful. Seeding the jalapeno definitely reduces the heat of it, which is a good thing. We like spicy food, but since my brother might be having a serving of this, we wanted to keep it mild. Kicking it up for ourselves was easy, just a drizzle of Sriracha did the trick.


There is definitely some psychological magic at play when it comes to color and food. Whenever we get our little mise en place going, and we see our multiple bowls filled with bright colors, it certainly boosts our spirits.


Notice the protective covering on the hand. You should never ever handle the insides of a jalapeƱo. If you touch the seeds even for a brief moment, you will be in pain all night long. And Angela from Oh She Glows was thoughtful enough to offer this caution in her recipe.


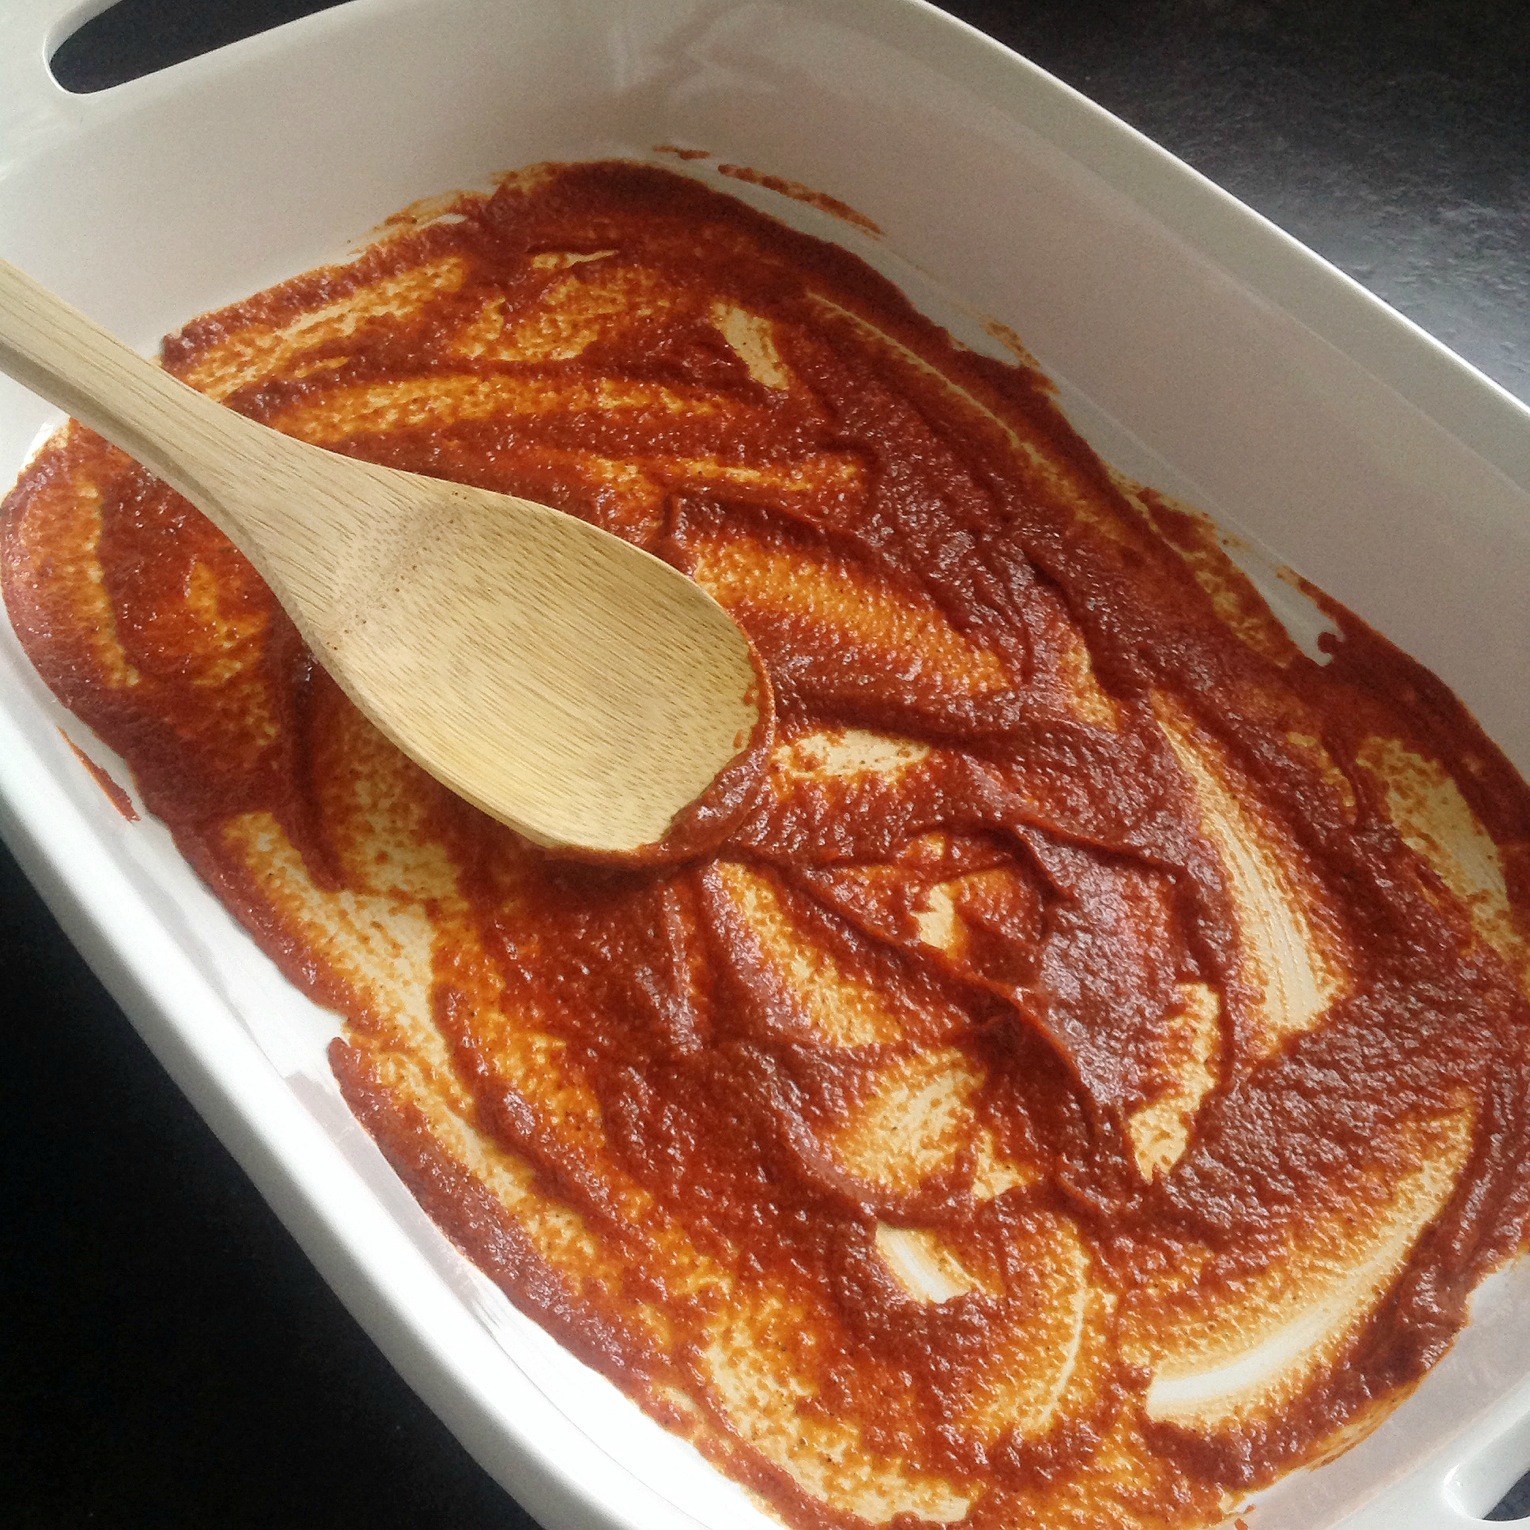
We love making enchilada sauce. It's one of those kitchen basics that becomes second nature to you, and after a while you'll develop "your very own" enchilada sauce. Oh She Glows provides a great simple recipe for this dish, which we basically followed but we then added the ratio of spices that are tried and true for us. It's all about your personal preference. As you can see in this pic, you add a bit of flour to thicken it up.


And here you can see that you can adjust the thickness whenever you want by just whisking in a bit of water. At this final stage of making the sauce, take the time to adjust the spices to your liking.


This tastes even more tomatoey and deeeelish than it looks!


We were excited that the recipe called for Fusilli. We are big fans of Fusilli or Rotini. The coils hold pockets of sauce and flavor perfectly. We went with whole wheat pasta. And yeah, you make sure to cook the pasta firm so that when you bake it in the casserole later it won't overcook and get mushy.


Again, just get a load of that color!


Ya know...sometimes, the above pic is what life is all about. 


And then life just gets better. mmmmmmm. Right here, this is the step when our recipe went from vegan to "almost" vegan. Oh She Glows adds vegan cheese at this point, but we didn't have any in, so we added shredded sharp cheddar.


And then we topped it off with the cheddar as well. We didn't go with real cheese for any taste reasons...we're actually fans of vegan cheese...but like I said, we didn't have any at the moment.


For serving, just top with chopped cilantro, crumbled tortilla chips, some cubes of avocado, a little salsa, a dollop of sour cream (regular or vegan), and maybe a squirt or two of Sriracha. 
We both went back for seconds. We loved it! I mean, what's not to love? This is certainly a crowd pleaser of a meal. You'd be hard pressed to find someone who is rubbed the wrong way by a dish like this. It's loaded with so many perennial favorites. We highly recommend this one for a night when you just want darn good classic food.

We hope you love it as much as we did. Thanks for reading...and a Big thanks to Oh She Glows for providing us with yet another awesome recipe!
xo, Jenny & Aaron